Language Objective- Work in groups to answer questions about a piece of jewelry.
Agenda-
- Sylabus
- Safety Contract
- Tool Contract
- Saw Piercing Project
Vocabulary:
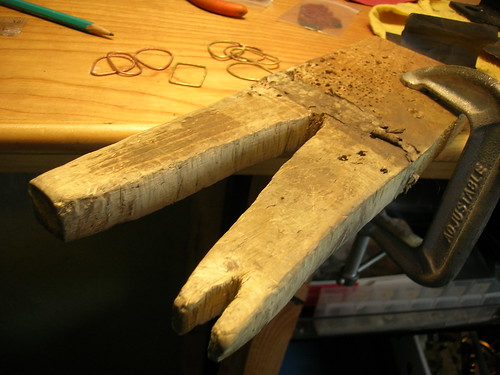 Bench Pin: This is used for filing, sanding, sawing, and any other work you do with your metal. It is attached onto the edge of the jewelry bench or table you use. This allows you to file or saw a piece of metal and have room to move your tool around and still hold onto the metal.
Below is a link to many different used bench pins.
http://www.flickr.com/groups/benchpin/pool/
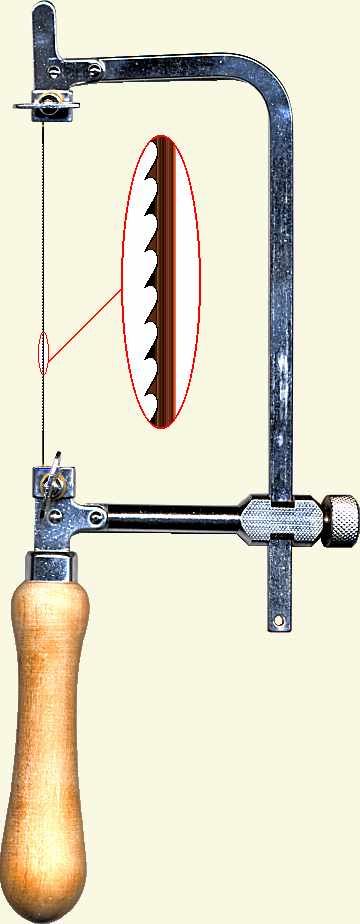
A piercing saw is a type of saw commonly used in jewelry making on sheet metal. It is usually used on softer metals as the saw is delicate.
http://www.dave-cushman.net/bee/piercingsaw.html

Flexible Shaft Tool-
A power rotary tool. It is similar to a Dremel tool found in woodworker shops. The tool system is a simple rotary motor that has a hand piece which can handle many different attachments. The user holds the hand piece with the desired attachment tip and operates the motor with a foot pedal.
Saw Piercing Assignment:The saw piercing assignment consists of cutting two designs from sheets of metal, (copper or brass), with a jewelers saw. The First Design will fit into an oval or round shape. The Second Design will have its own shape. This process will give you the skills required to use of some basic jewelry tools. Designs must be original. Craftsmanship, design, and the quality of the finished work, are the primary criteria for grading your work.
Below is a link to many different used bench pins.
http://www.flickr.com/groups/benchpin/pool/
A piercing saw is a type of saw commonly used in jewelry making on sheet metal. It is usually used on softer metals as the saw is delicate.
http://www.dave-cushman.net/bee/piercingsaw.html
Flexible Shaft Tool-
A power rotary tool. It is similar to a Dremel tool found in woodworker shops. The tool system is a simple rotary motor that has a hand piece which can handle many different attachments. The user holds the hand piece with the desired attachment tip and operates the motor with a foot pedal.
 | |
| Shelby W. MRHS Jewelry Student 2010-11 |
Tools:
- Flexible Shaft Tool- for drilling
- C Clamp- Your Bench Pin and C-Clamp will be set up every class day. All your work will be done using these two invaluable tools.
- Bench Pin
- Jewelers Saw
- Files
- Sand Paper
- Buffing and Polishing equipment-
Step 1: 10-12 beginning design concepts for both pendants. One design should fit into an oval, or round shape. The other design can be its own shape. NO BIGGER THAN 1 1/2 X 2 INCHES. These will be reviewed for credit. LEAVE ENOUGH SPACE BETWEEN PIERCED AREAS AS TO NOT CUT OR BUFF THROUGH THE METAL FROM ONE SPACE TO ANOTHER. Include a minimum of three piercings within the shape.
Step 2: With the instructor, select one design for your final. Upon finalization of drawings, ideas to the instructor and receive materials.

- Glue paper drawing on metal with rubber cement.
- Punch the negative spaces with the awl and drill holes in metal. There should 3 three saw pierced areas within your design.
- Saw inside first then outside edges with jewelers saw.
- Support work with bench pin and C-clamp by securing to table top.
- After all sawing is complete file all edges with either a large half-round file or small needle file.
Finishing
- Sand with wet-dry sandpaper start with 320, then use 400, and finally use 600
- Buff using Tripoli
- Polish using Rouge
- Attach finished piece to leather cord using a link
No comments:
Post a Comment